Van Kitchen Layout Guide: Small Space, Real Kitchen
The five functional zones of a van kitchen, how they scale from cargo van to skoolie, and the layout mistakes that kill first-time builds.
The three laws of van kitchen layout
After building out three vans and watching friends repeat the same mistakes, I believe every successful van kitchen obeys three non-negotiable rules. Break one and you'll still have a kitchen. Break two and you'll stop cooking in the van within a month.
Law 1: The cook stands in one spot. A van galley is not a home kitchen. Your feet should plant in a single 24 by 24 inch square, and from there you should reach stove, sink, fridge, and at least 24 linear inches of prep counter without taking a full step. If your layout forces you to shuffle sideways to reach the fridge while a pan is going, it is already broken.
Law 2: The fridge opens outward, never into the cook. Front-loading compressor fridges sweep a surprisingly large arc, usually 90 degrees. That arc must not intersect the cook's standing square, and it must not block the aisle. I have seen beautiful builds where opening the fridge physically pins the cook against the stove.
Law 3: Countertop is sacred. Every square inch of uninterrupted, flat, durable countertop is more valuable than any gadget you are thinking of buying. You will constantly trade countertop for features (a second burner, a deeper sink, a spice rack) and you will regret almost every trade.
Plant your feet, sweep the fridge door, and never give up counter space lightly.
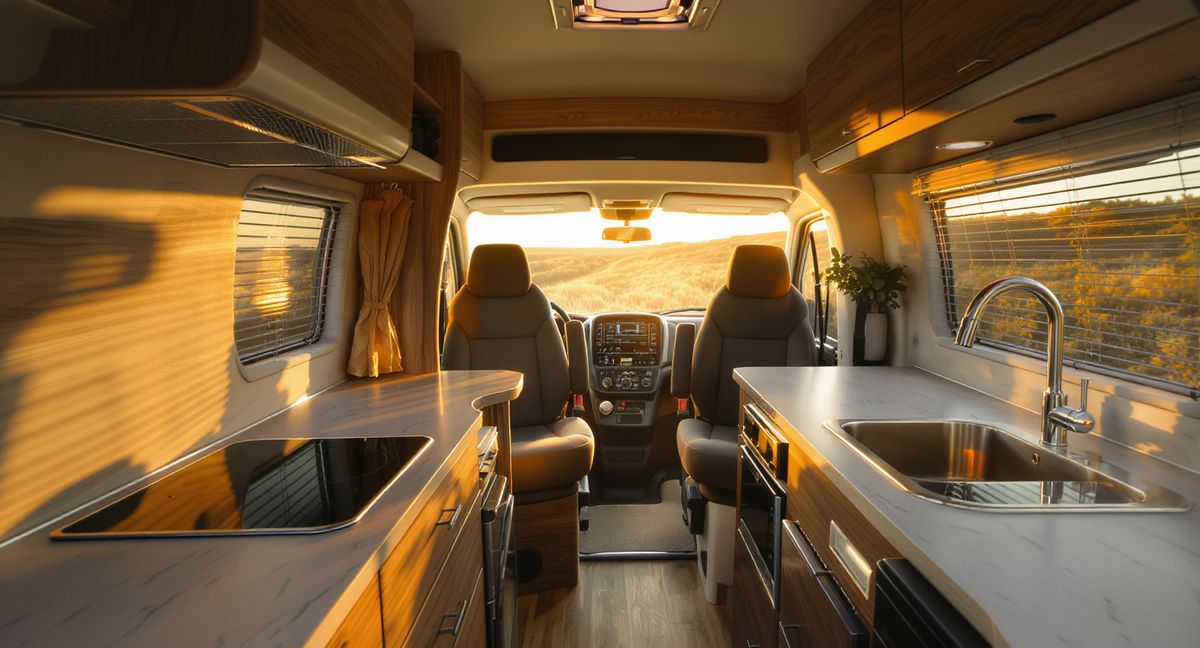
The five zones
Every working kitchen is organized around five functional zones. The trick in a van is fitting them into 18 to 48 square feet instead of 120.
Cook
A single-burner induction plate needs about 12 by 14 inches plus 6 inches of heat clearance on each side. A two-burner propane cooktop wants 22 by 14 inches of cutout plus 3 inches to any combustible. Above the burner: 24 inches of vertical clearance, 30 inches if unprotected wood.
Cool
For a 45 to 65 liter compressor fridge, budget exterior dimensions plus 1.5 inches air gap behind, 0.5 inch on each side, and a vent path out. Top-loading chest coolers need 14 to 18 inches of clear air above. See the 12V fridge buying guide.
Prep
Minimum viable is 18 linear inches of clear, flat countertop adjacent to the stove. Good is 24 inches. Luxurious in a van is 30. Less than 18 and you'll chop on the stove lid, which is both annoying and a fire hazard.
Wash
A single basin 10 by 12 to 15 by 15 inches, 5 to 7 inches deep, with a faucet that clears a 4 inch pot. Under it lives the freshwater or grey tank. This zone is most often under-budgeted for under-counter volume.
Store
Budget 2.5 cubic feet of pantry per person for a two-week rotation, plus 1.5 to 2 cubic feet for cookware. Split into small cubbies, not one big cave, or everything migrates to the bottom and breaks.
Placing the zones: the galley work triangle
The house-kitchen work triangle (fridge, sink, stove; 12 to 26 foot perimeter) doesn't apply literally to a van. What applies is the ordering it implies.
The canonical galley order is:
- Store (pantry)
- Cool (fridge)
- Prep (counter)
- Cook (stove)
- Wash (sink)
That order matches the flow of a meal: pull from storage and fridge, prep next to them, slide onto the stove, finish at the sink. Reversing any adjacent pair adds a step to every meal — thousands of unnecessary movements per year.
In a van, you usually cannot get all five zones in a straight line. The priority is keeping prep adjacent to both cook and cool. Wash can go on an end cap. Store can go under or across the aisle. Never split prep from cook. Try the Kitchen Layout Planner before you commit to plywood.
Layout by vehicle size
Small cargo van (Transit Connect, ProMaster City, NV200)
Interior length 82 to 90 inches, width 48 to 56 inches between wheel wells. One wall for the whole kitchen:
- Single-burner induction or butane stove on a 20 by 16 inch counter module
- 30 to 45 liter top-loading 12V fridge under the counter, lid hinged toward the slider
- 10 by 12 inch bar sink with foot pump, 4 gallon freshwater jug underneath
- 14 inches of prep counter between stove and sink
- One 12 inch pantry cubby
Total footprint: about 48 inches long by 20 inches deep. Expect one-pan meals.
Mid-size van (Sprinter 144, Transit 148, ProMaster 136)
Interior cargo length 120 to 144 inches. You can run a full galley down one wall:
- Driver-side galley, 72 inches long, 22 inches deep
- Pantry cabinet at the front, 20 inches wide, full height
- Front-loading 65L compressor fridge next, door opening toward the rear
- 30 inches of uninterrupted countertop
- Two-burner cooktop flush-mounted
- 14 by 14 inch sink at the rear end, over the grey tank
Upper cabinets only above the sink and stove — never above the counter middle. You want headspace for a Dutch oven.
Extended van (Sprinter 170, Transit 148 ext, ProMaster 159)
84 to 96 inches of kitchen is achievable. My preference: keep the main run at 84 inches and add a 12 inch hinged extension wing that folds out over the aisle when parked. Gives 96 inches of working surface without eating aisle space while driving.
Skoolie
Interior width 88 to 92 inches, length 18 to 40 feet. The rule flips: you have too much space. Keep the galley tight — 96 to 120 inches of run, all five zones within arm's reach — and use the extra length for dining, lounging, and a pantry closet across the aisle. A skoolie kitchen that sprawls across 16 feet of bus is one where you walk six steps for every onion.
Class B/C RV
You inherit a layout. The common RV mistake is a two-burner stove with a glass cover that counts as "counter" in the brochure but is useless the moment you light a burner. Replace with a single induction burner plus a solid cutting board insert and you've doubled your usable prep space.
Countertop rules
- Minimum length: 18 inches of clear prep counter adjacent to the stove. Below this, cooking becomes unpleasant.
- Depth: 20 to 22 inches. Any shallower and a standard dinner plate hangs off the front. Any deeper and you lose aisle width.
- Material: butcher block, solid surface, or 16 gauge stainless. Avoid laminate (it swells at the seams), avoid tile (grout cracks on washboard roads), avoid thin epoxy pours over plywood (they crack at the edges).
- Fiddle rails: 0.75 inch lip on all exposed edges. Non-negotiable for a moving van. Without fiddles, anything round rolls off the counter the first time you hit a cattle guard.
- Extension wings: a 10 to 14 inch hinged flap that folds down while driving and locks level when parked. Best upgrade you can make to a small-van kitchen.
- Seam placement: never put a counter seam directly behind the sink or stove. Water and heat find seams.
Fridge placement deep-dive
The fridge is the component most often placed badly, because builders think of it as furniture instead of as a heat-pumping appliance that opens.
Never put the fridge next to the stove. A compressor fridge dumping heat six inches from a burner works twice as hard and cycles constantly. Minimum 12 inches of separation, and ideally a cabinet or the sink between them.
Never put the fridge in direct sun. South-facing (in the northern hemisphere) wall of the van in summer will hit 140 F internally. Your fridge will run 24/7 and drain the battery. Put it on the shaded wall or behind an insulated cabinet panel.
Ventilation clearances: 1.5 inches behind, 0.5 inch on the sides, 1 inch above for a front-loader. The air has to get in and out, and that usually means a lower intake louver and an upper exhaust louver in the cabinet face.
Door orientation: the door should open toward the aisle, not toward the cook's standing square. On most mid-size van galleys, that means the hinge is on the end closest to the front of the van so the door swings toward the rear.
Parked askew: you will often sleep on ground that tilts 3 to 5 degrees. Front-loaders are fine with this, but top-loaders become a wrestling match because the lid won't stay up on the downhill side. Add a lid prop. Drawers are the most forgiving of any orientation but cost the most.
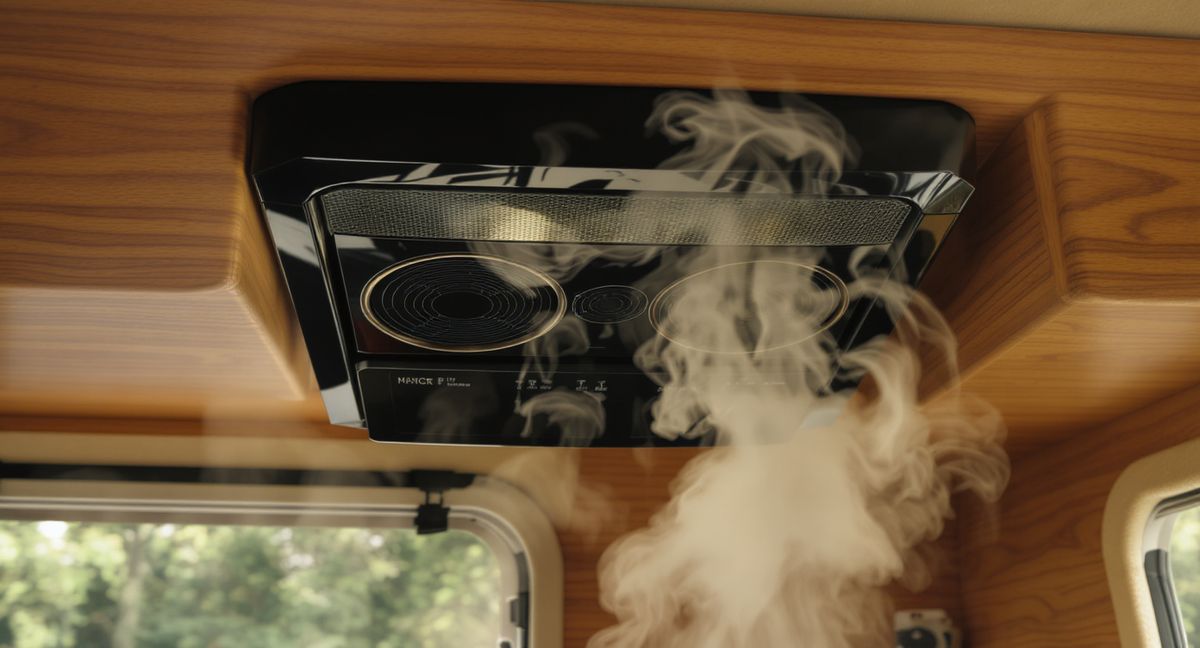
Ventilation and the forgotten stove hood
Almost nobody installs a real stove hood in a van, and almost everybody wishes they had. A single sauteed onion will saturate the fabric in a 70 square foot van for two days if you can't vent it out.
Your options, ranked:
- Dedicated 12V range hood, 4 or 5 inch duct to a side-wall louver. 80 to 180 CFM. This is the right answer and almost nobody does it because it's hard to plumb.
- Roof fan directly above the stove, set to exhaust. Works well if the fan is within 24 inches of the burner. A MaxxAir or Fan-Tastic at 900 CFM moves plenty of air.
- Open window plus roof fan, the cross-breeze approach. Mediocre, but better than nothing.
- Nothing. You will regret this specifically the first time you cook bacon.
Put the stove directly under the roof fan if you possibly can. This single decision eliminates more build regret than almost any other.
Common layout mistakes
I have seen every one of these, usually more than once.
- Front-loading kitchen at the rear doors. Looks gorgeous in the tour video. In practice, you are cooking with the back of the van open to weather, bugs, and strangers at every trailhead. The kitchen should be inside the van, not in the tailgate.
- Tall upper cabinets that block the side windows. You traded your only natural light and your sightline for 1.2 cubic feet of storage you could have put under the bench.
- Sink under a fixed bed platform. Sounds clever until a fitting leaks and you're pulling the mattress to access the trap at 11pm in a Walmart parking lot.
- Stove on the slider-door side. Wind gusts blow out propane burners and chill induction pans. Put the stove on the far wall from the main door.
- Pantry behind the fridge door. Every time you want rice, you open the fridge first. Walk through your own layout mentally before building.
- Butcher block with no sealed edge at the sink. Water wicks into end grain, swells, cracks. Seal all sink-adjacent edges with food-safe epoxy or switch to stainless in that zone.
- No dedicated trash location. Trash ends up on the counter. Plan a 2 gallon bin door-mounted or cabinet-mounted from day one.
- Countertop at bed height. If the bed is at 38 inches and the counter is at 38 inches for flow, you will slam your hip into the counter every morning. Counter at 34 to 36 inches, always.
Checklist before you cut plywood
Run through this before your first saw cut. If any answer is "I'll figure it out later", you are not ready.
- Have I stood in the space with a cardboard mockup for at least 30 minutes pretending to cook?
- Does the fridge door arc clear the cook's standing square and the aisle?
- Is there 18+ inches of clear prep counter adjacent to the stove?
- Is the stove under or within 24 inches of the roof fan?
- Is the fridge at least 12 inches from the stove and out of direct sun?
- Is the counter 34 to 36 inches off the floor and 20 to 22 inches deep?
- Do I have fiddle rails on every exposed counter edge?
- Is the trash bin planned and located?
- Is every drawer and door accessible with the bed made and the slider open?
- Have I run the Budget Calculator on the appliances I actually plan to buy, not the aspirational ones?
Next steps
Sketch your galley on graph paper at 1 inch equals 4 inches. Cut paper rectangles for each zone at real dimensions and slide them around until the order matches the canonical galley flow. Then build a cardboard mockup inside the actual van and spend a weekend pretending to cook — boil water, chop an onion, wash a pan. You will find three problems in the first hour, and each one saves you a rebuild later.
When the mockup survives a weekend, only then cut plywood. The Kitchen Layout Planner can help you iterate faster, and the 12V fridge buying guide will narrow your fridge choice before you commit to a cabinet cutout. The best van kitchens are not the prettiest ones — they're the ones where, three years in, the owner still cooks dinner in them instead of driving to a taqueria.
More in Layout Guides
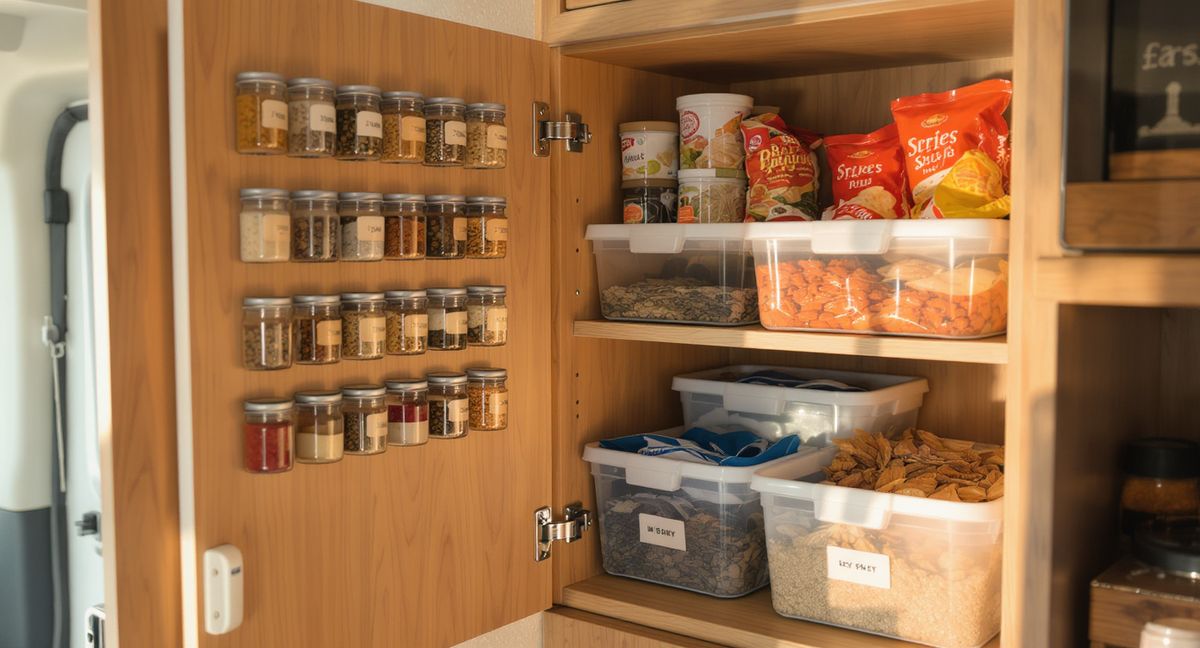
Van Kitchen Storage Solutions That Actually Work
Pantry bins, magnetic spice racks, drawer systems, and the organization hacks that survive washboard roads.
Van Kitchen Ventilation: Fans, Hoods, and Why It Matters
Why every serious van kitchen needs active ventilation, the difference between MaxxFans and rangehoods, and how to install a 300 CFM hood that actually works.
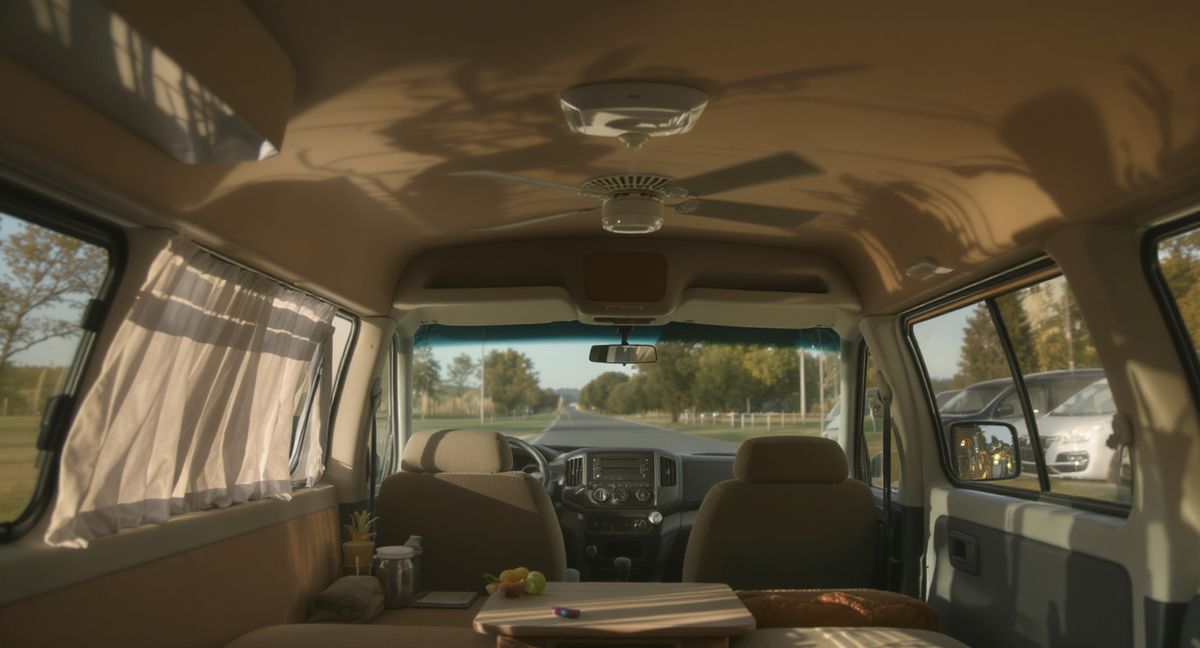
How to Cool a Van Without AC: 12 Strategies That Actually Work
Insulation, ventilation, reflective covers, parking strategy, and the fans worth buying — the 12 ways to keep a van under 80°F without burning 800W on air conditioning.