Van Water System Setup: Fresh, Grey, and Filtration
How to design a 20–40 gallon water system for a van kitchen: tanks, pumps, filters, and a grey water setup that won't stink.
The three problems a van water system has to solve
A van water system has to solve three problems at once: storing enough fresh water for your use pattern, delivering it to the sink at usable pressure, and managing the greywater that comes back out. Get any one of these wrong and you'll end up stopping for water every two days, fighting a moldy sink, or tracking soap residue into the galley every time you wash a dish.
This guide covers the realistic design of a 20–40 gallon fresh/grey water system for a van kitchen — the components, the plumbing, the filtration, and the mistakes that kill first-time builds. It assumes a mid-size van kitchen (Sprinter, Transit, Promaster) with one or two people living full-time, and an honest target of 3–5 days between water refills.
Fresh water: how much do you actually use?
The first mistake is guessing your daily water usage. Measure it instead. A realistic per-person baseline:
- Drinking and cooking water: 1.5 gallons per person per day
- Dish washing (efficient): 0.5 gallons per person per day
- Hand washing and rinsing: 0.3 gallons per person per day
- Personal use (teeth, face): 0.2 gallons per person per day
Subtotal: 2.5 gallons per person per day for a frugal van life user. Two people: 5 gallons/day. Add 20% buffer: 6 gallons/day for two.
Showering is not in that list because most van dwellers shower outside the van or at truck stops/gyms. If you do have an indoor shower, add 4–6 gallons per shower day.
Translating to tank size: at 6 gallons/day for two people, a 20-gallon fresh tank gives you 3.3 days. A 30-gallon tank gives you 5 days. A 40-gallon tank gives you 6.7 days. Match tank size to your actual refill cadence — if you're in civilization every 3 days anyway, 20 gallons is plenty. If you boondock for a week, go 40.
Tank types and placement
Van water tanks come in three main types:
Rigid plastic (HDPE or XLPE) rectangular tanks. The standard for permanent installs. Cheap ($60–150 for 20–40 gallon), food-grade, easy to plumb. Install under a bench, under a bed, or in a custom cabinet. Plan for a rectangular footprint and securely bolt it down — 30 gallons of water is 250 lbs.
Collapsible bladder tanks. Roll up when empty, expand as they fill. Work in non-rectangular spaces. Cheaper per gallon but harder to plumb reliably and can develop pinhole leaks over time. Best for weekend builds or as backup capacity.
DIY from food-grade containers. Multiple 5-gallon jugs or a 7-gallon Aqua-Tainer. Zero install cost, zero plumbing. Fill by swapping jugs at any potable tap. The drawback is manual pump requirement (foot pump or hand pump) and limited capacity.
Placement rules for rigid tanks:
- Low in the van for center of gravity.
- Protected from freezing (inside the heated cabin, not underneath).
- Accessible fill port from outside the van (through a deck fitting).
- Cleanout port for annual sanitizing.
- Vented so air can replace water as the tank drains.
Pumps: the heart of the system
You have three pump options:
12V diaphragm pump (most common). Shurflo, Flojet, Seaflo are the common brands. Draws 4–8 amps when running, delivers 1–3 GPM at 45–60 psi. Self-priming, runs on demand via a pressure switch. Cost: $80–180. Noise: moderate. Lifespan: 3–5 years under daily use.
Foot pump (manual). Whale Babyfoot or equivalent. Zero electrical draw. Delivers water only while you pump. Cost: $60–100. Best for budget builds and people who want to minimize electrical complexity.
Hand pump. Whale V-series. Zero electrical draw, mounts to sink deck. Best for backup or galley layouts where you don't want a foot pump.
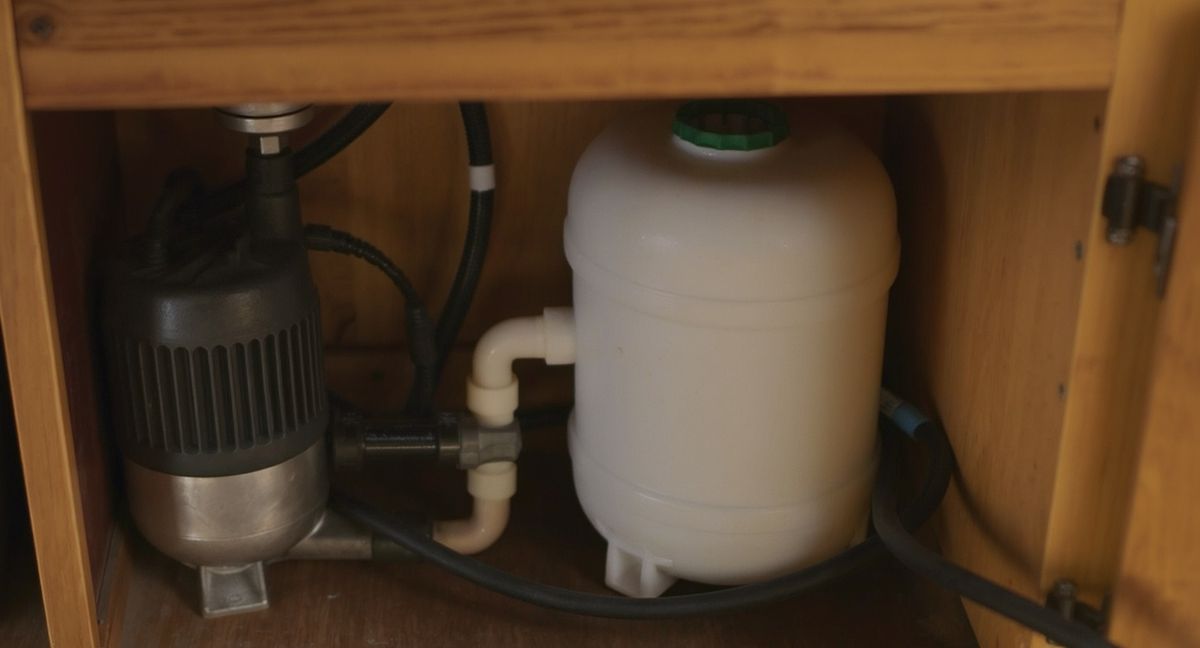
For a mid-size full-time van, a 12V diaphragm pump with an accumulator tank is the right answer. The accumulator smooths out the pulsing draw from the pump and reduces cycling (and noise). The cost is modest and the user experience is closest to a house kitchen.
Critical install detail: always put a strainer before the pump (filter out debris from the tank). Always put a pressure regulator after the pump if you're running to a faucet not rated for 60 psi. Always mount the pump on rubber isolators to reduce vibration transmitted to the van body.
Filtration: where water quality gets real
A van water system needs filtration at two points: before the tank (coarse, to protect the pump from debris) and at the drinking tap (fine, for health).
Pre-tank filtration: a 5-micron sediment filter inline on the fill hose catches most of the grit and sand you'd get from unfamiliar spigots. Cost: $20 for the housing, $5 for cartridges. Change every 6 months or when flow slows.
Drinking-tap filtration: here you have choices.
Gravity pitcher filter (LifeStraw Home or equivalent). Lives on the counter, filters water you pour in manually. Zero plumbing, zero power, NSF-tested removal of bacteria, parasites, lead, microplastics, and PFAS. The LifeStraw Home Gravity Pitcher review covers this in detail. This used to be the Berkey slot, but Berkey was pulled from Amazon and Walmart in 2023–2024 following an EPA registration dispute — the LifeStraw Home is the best gravity pitcher you can still buy through major retailers with working warranty support. Best for people who don't trust source water.
Inline carbon block filter. Plumbs directly into the cold water line before the faucet. Removes chlorine, taste, and sediment. Doesn't remove bacteria or viruses (so source water needs to be potable already). Cost: $30–80. Easy install. Good for people who fill from municipal taps.
Inline pump filter (Sawyer Squeeze inline adapter or similar). 0.1-micron hollow fiber removes bacteria and protozoa. Doesn't remove chemicals. See the Sawyer Squeeze review for details. Best as backup to municipal water or for occasional sketchy source use.
Multi-stage system (UV + RO or carbon + RO): overkill for most van builds. High power draw, frequent filter changes, wasted reject water. Skip unless you have a specific use case.
Grey water: the forgotten problem
Greywater is the water that goes down your sink after dish washing. It's full of food particles, soap, and grease, and if you don't manage it, it becomes the most persistent smell in your van.
Grey tank options:
Dedicated grey tank (built-in). Mirror image of the fresh tank, plumbed from the sink drain, drained via an outlet valve. Cost: similar to fresh tank. Capacity should be at least equal to fresh water (you'll generate slightly less grey than fresh due to drinking water, but not much less).
Portable jug (5–7 gallons). A simple food-grade jug under the sink. Drain the sink trap into it. Dump at a dump station or on bare ground (never near a waterway, never in urban areas). Cheapest option, works fine.
Direct drain (outside the van). Some builds route the sink drain directly outside. This is only legal and ethical in specific backcountry contexts and is banned in most developed campgrounds and all urban areas. Not recommended.
Smell management — the most important part:
- Scrape all food debris into the trash before dishwashing. Food particles in the grey tank are the primary source of smell.
- Add a tablespoon of baking soda to the grey tank weekly. Neutralizes acidic buildup.
- Empty the grey tank every 2–3 days, even if it's not full. Stagnant water smells worse than dirty water.
- Rinse the tank occasionally with hot water and a drop of bleach.
- Use a sink strainer. Catches everything above a millimeter, prevents pump clogs, saves your grey tank.
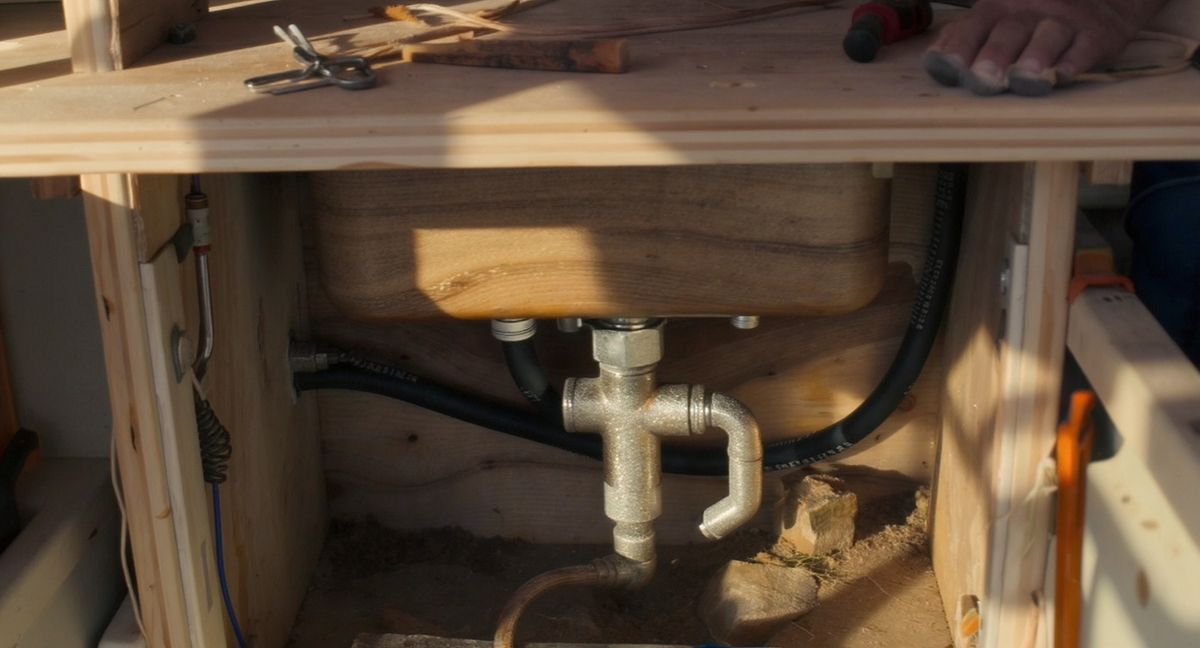
Sink and faucet selection
Van sinks are either single-basin bar sinks (10 x 12 inches, 5 inches deep) or compact full sinks (15 x 15 inches, 6 inches deep). The larger is better for dish washing but eats counter space.
Faucet selection matters more than you'd think. A low-profile gooseneck with a single lever gives you enough height to fit a 4-inch pot under the spout. A pull-out spray faucet makes rinsing easier but has more failure points. A foot-pump-only faucet works but requires the foot pump install.
Practical choice for most van builds: a 12V pressurized pump to a single-lever RV-style faucet in a 10x12 bar sink. Total cost under $300, works like a house kitchen, minimal complexity.
Full system: what it looks like wired up
A complete mid-size van water system:
- 30-gallon fresh tank under the dinette bench, vented, with a cleanout port
- Exterior fill port with 5-micron sediment filter inline
- Shurflo 4008 diaphragm pump with 1-gallon accumulator tank, mounted on rubber isolators
- Inline carbon block filter on the cold line to the faucet
- Single-lever RV faucet in a 10x12 bar sink
- Sink strainer catching debris
- Sink drain into a 5-gallon jug (grey tank) under the sink
- LifeStraw Home Gravity Pitcher on the counter for drinking water from unknown sources
Total cost for components: $600–900 depending on brand choices. Install time for a competent DIYer: 1–2 weekends. Daily maintenance: clean the sink strainer, empty grey every 2–3 days.
Winterization
Water systems freeze. At 32°F and below, the water in tanks, pumps, and lines expands and splits whatever contains it. You have three options:
Drain the system. Remove all water before freezing temperatures. Bypass the pump and blow compressed air through the lines. Safe but inconvenient for daily use.
Heat the system. Install the tanks inside the heated cabin. Wrap lines with heat tape powered from the battery or shore power. Works but adds electrical load and complexity.
RV antifreeze. Non-toxic propylene glycol pumped through the system before cold snaps. Protects everything but requires flushing before next use. Standard RV practice.
For van life crossing cold climates, plan for winterization from the start. See our cold-weather van cooking guide for the full winter operations playbook.
Final word
A van water system is not complicated, but it rewards discipline. The failures I see most often are: guessing capacity instead of measuring, skipping pre-pump filtration, ignoring grey tank smell management, and not planning for winter. None of those are technical problems — they're discipline problems. If you size honestly, install with protection filters, empty grey regularly, and plan for freezing, a good water system disappears into the background of your build and just works.
FAQ
How many gallons of water do two people need in a van? About 5–6 gallons per day for efficient use (drinking, cooking, dish washing, hand washing), or 8–12 gallons per day if you shower indoors. A 20-gallon tank gives two people roughly 3 days of autonomy.
Do I need a 12V water pump for a van kitchen? Not strictly — foot pumps work fine and draw zero power. But a 12V diaphragm pump makes the kitchen feel like a house kitchen and adds only 4–8 amps of draw while running (a few Ah per day total). For full-time builds, it's usually worth it.
How do I keep the grey tank from smelling? Scrape food into the trash before dish washing, add a tablespoon of baking soda weekly, empty the grey tank every 2–3 days, and use a sink strainer. Stagnant water with food debris is the main cause of smell.
What's the best water filter for van life? For full-time use with potable source water, a simple inline carbon block filter handles chlorine and taste. For unknown sources or mixed-source fills, a gravity pitcher like the LifeStraw Home is the current best-in-class — NSF-tested against bacteria, parasites, lead, microplastics, and PFAS, and actually available on Amazon and Walmart. For emergency backup, a Sawyer Squeeze handles bacteria and protozoa.
Can I use a water tank inside the van? Yes, and in most climates you should — it keeps the water from freezing. Place the tank low in the van for center of gravity, and bolt it down securely. Thirty gallons of water weighs 250 lbs and will become a projectile in an accident if not restrained.
How do I fill my van water tank? The cleanest setup uses an exterior fill port (a deck fitting you attach a garden hose to). Fill from any potable tap — campgrounds, state parks, gas stations with outdoor spigots, or friendly homes. Use a dedicated drinking-water hose (white/blue) not a garden hose.
More in Water Systems
Van Kitchen Dish Washing: The System That Actually Works
How to clean dishes in a van without wasting water, smelling up the cabin, or driving yourself crazy. A real system, not a theory.
DIY Van Sink Setup for Under $100
Build a fully functional van galley sink — fresh water in, grey water out — for less than $100 in parts. Step-by-step with photos, parts list, and the foot pump that costs $30.