Best Van Kitchen Storage: Complete Organizing Guide
How to organize a van kitchen that survives washboard roads: pantry tiers, spices, cookware, fridge and knife storage, plus the best bins and cases by budget.
Disclosure: As an Amazon Associate I earn from qualifying purchases. Links to Amazon on this page are affiliate links: if you buy through one, VanLifeKitchens.com may earn a commission at no extra cost to you. Read our affiliate disclosure.
Van kitchen storage is the category most new builders underestimate and most experienced van dwellers obsess over. A house kitchen assumes gravity works, drawers stay closed, and dishes stay put. A van kitchen gets driven down washboard roads at 35 mph, parked on slopes, and opened in a cabin that was 70°F at breakfast and 100°F by mid-afternoon. Every storage decision has to survive motion, heat swings, and very little space, all at once.
This guide is for anyone building or reorganizing a van, truck camper, or skoolie galley. It covers the four kinds of things a van kitchen has to store, the principles that make storage survive the road, how to organize the pantry, cookware, utensils, fridge, and awkward flat items, the products worth buying from budget to premium, and the most common mistakes. Most of what works is cheap. The difference between a galley that feels cramped and one that feels roomy is rarely square footage; it is whether every item has a dedicated home, whether that home survives the drive, and whether you can reach what you need without unpacking three other things first.
The four storage problems a van kitchen has to solve
A van kitchen stores four very different kinds of things, and each needs its own strategy. A good system handles all four. A bad one gets one right and fails the other three.
Dry goods (pasta, rice, beans, flour, oats, coffee, spices). These need airtight containers to keep out moisture, dust, and pests, and they need to fit dense shelf space and survive being thrown around. Weight is rarely the issue. The answer is gasketed, stackable bins.
Fresh produce (onions, garlic, potatoes, squash, apples, citrus). These need the opposite of airtight: ventilation, darkness, and protection from bruising, because bruises become rot. The answer is mesh bags or an open basket that is still restrained, ideally low in the van where it tends to stay cooler than upper cabinets.
Cookware and utensils. These need rattle-free storage (metal on metal is loud and slowly damages surfaces), fast access, and ideally one-handed retrieval. The answer is nesting cookware, drawer organizers, pan protectors, and wall-mounted strips or hooks.
Heavy and bulky items (Dutch oven, cast iron, water jugs, fire extinguisher). These need a low center of gravity, secure mounting so they cannot shift in a panic stop, and enough room not to crush anything else. The answer is floor-level bins, fixed brackets, or strapped-down positions.
The core principles
Vertical space is free, horizontal space is expensive
In a van, horizontal surfaces are expensive: the countertop, drawer bottoms, and floor are limited and shared with cooking, prep, and walking. Vertical surfaces are almost always underused: cabinet walls, the backsplash, and the inside of cabinet doors.
Before you put anything on a counter or in a drawer, ask whether it can go on a wall instead. A countertop spice rack that takes 12 by 6 inches of counter can eat a large share of a small galley's prep space; the same spices on a wall plate cost zero counter. That one question drives most of the solutions in this guide.
Everything moves as a unit (modular beats built-in)
The single most useful idea in van kitchen storage is that items should live in containers, and containers should move as units. When you pack up camp you move four bins, not thirty loose items, and the reverse when you set up.
Modular storage has three advantages over purpose-built cabinets:
- It survives build changes. A bin moves to any cabinet, in any van, at any time. A built-in cabinet is permanent.
- It fails gracefully. If one bin cracks, you replace a bin. If a custom cabinet fails, you are rebuilding part of the galley.
- It scales. Add a bin when you need more storage, remove one when you need the space back.
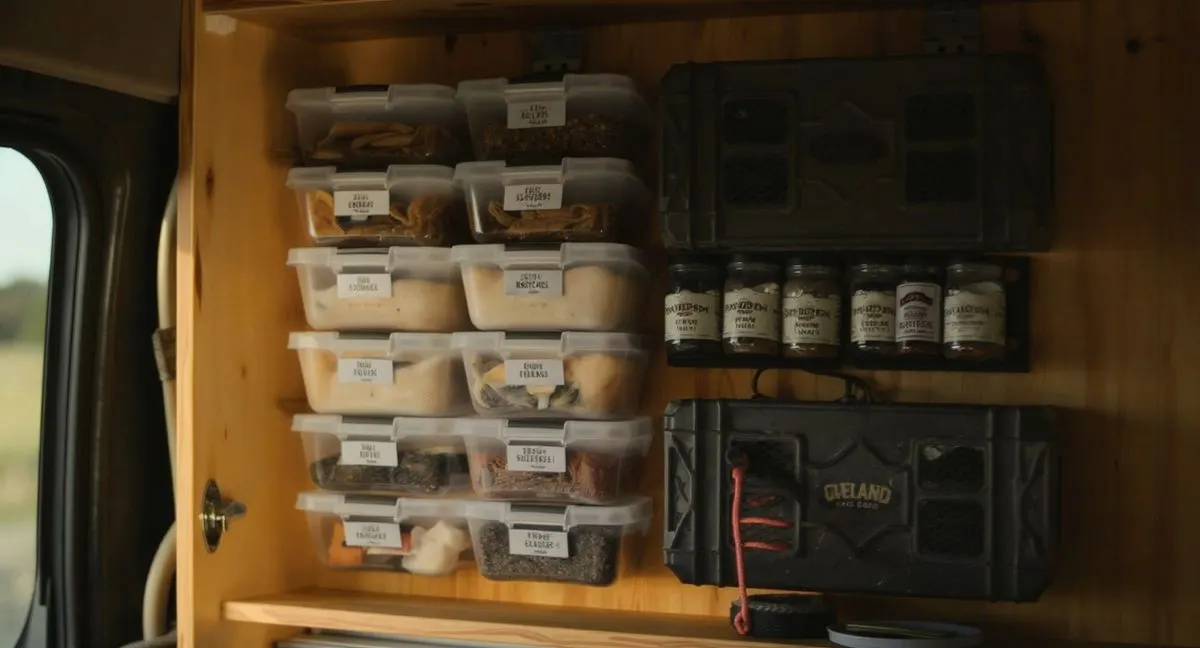
Containment is a bonus: a bag of rice that splits inside a bin is a minor annoyance, while the same bag loose in a cabinet means rice in every corner of the van for weeks. Clear bins also let you see contents without opening them, and pulling one bin out is faster than digging through a deep cabinet. The Ford Transit Weekend Warrior and Sprinter 144 Minimalist setups both use a modular-first approach.
The five rules for washboard road survival
Every piece of storage in a van kitchen has to survive 30+ mph over washboard gravel without breaking, shifting, or rattling. This is the hardest test of storage quality and the reason so many house-kitchen products fail quickly in vans.
Rule 1: Every container has a fixed location. Nothing floats loose in a cabinet. Loose items become projectiles in a hard stop. Use straps, cargo nets, or non-slip liner to keep bins in place.
Rule 2: Stacking requires locking. Two bins stacked without a locking or lashing method will separate on the first big bump. Snap-together lids, mechanical latches, or a strap around the stack all work. If your bins don't lock, tie them down.
Rule 3: Keep glass out of cabinets. Glass jars break when they slide and hit each other. Use polymer or stainless containers for anything that rides in a cabinet while driving. The exception is small spice jars on a magnetic rack mounted inside a closed cabinet or strapped in place, so a jar that shifts on a bump has nowhere to go.
Rule 4: Airtight is not waterproof. A gasketed bin keeps humidity and dust out, but it is not rated for submersion. If a water line or sink leaks into a cabinet, water can work past a lid seam over time. Anything that truly must stay dry (electronics, documents, spare batteries) belongs in a sealed hard case with a published waterproof rating.
Rule 5: Sharp items live in sheaths or fixed slots. Knives, graters, peelers, and scissors go in a block, a sheath, or a strap-down position, never loose in a drawer. More on this in the utensil section below.
Organizing the pantry: the three-tier system
Dry goods are bulky, and the easiest way to organize them is by how often you reach for them:
Tier 1, daily use (eye-level cabinet, front-facing):
- Coffee
- Sugar or honey
- Salt, pepper, and cooking oil
- Whatever bread or tortillas are in the current rotation
Tier 2, weekly use (mid-level cabinet or under-bench bins):
- Rice, pasta, lentils, beans
- Canned tomatoes, coconut milk, beans
- Oats and granola
- Nuts and dried fruit
Tier 3, backup stock (deep or hard-to-reach storage):
- Extra rice and dry staples
- Backup cans
- Spare oil
- Emergency food
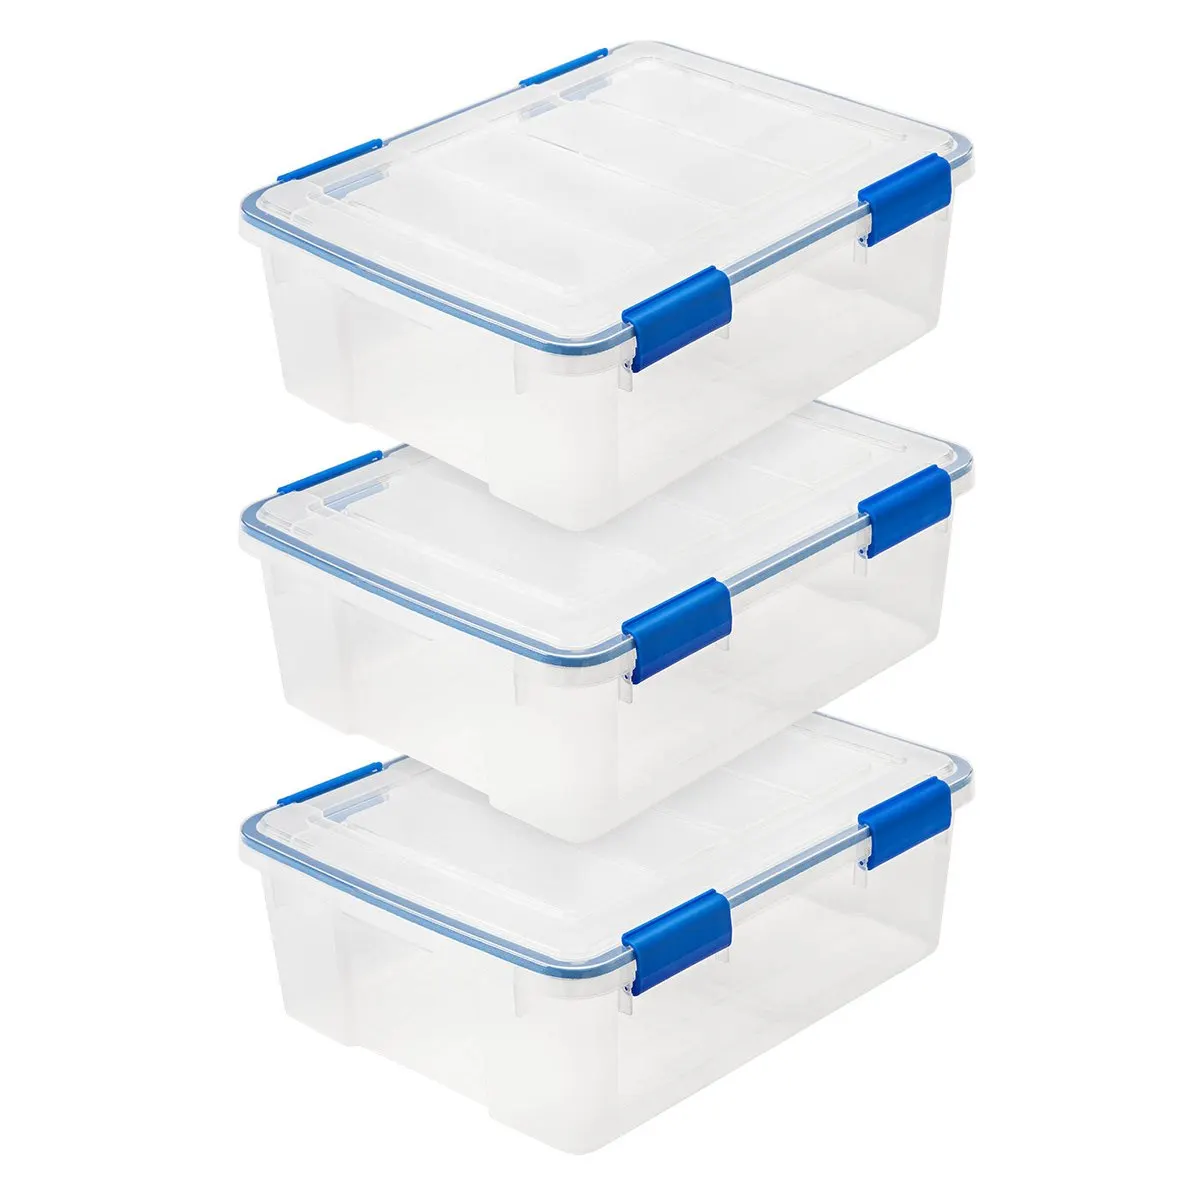
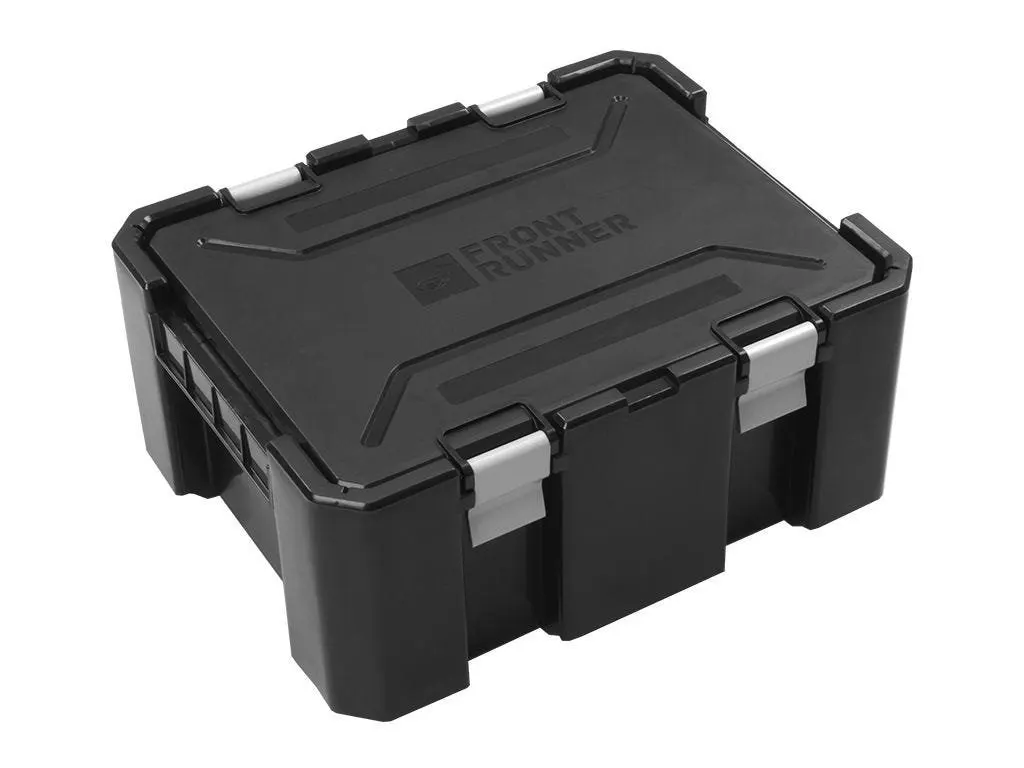
Tier 1 lives in tall, narrow containers or bottles held with a strap or a lipped shelf. Tiers 2 and 3 belong in gasketed bins with latching lids. Budget builds can use the IRIS USA Weathertight 19-Qt bins; rough-road builds are better served by the Front Runner Wolf Pack Pro. Both keep dust out and stack securely. For what to actually put in those bins, see the van pantry shelf-stable staples guide, and for how bin size shapes how often you shop, the van life grocery shopping strategy.
Fresh produce is handled separately. Keep onions, garlic, potatoes, and squash in a mesh bag or ventilated basket at floor level, away from the stove and out of direct sun. Don't seal them in a gasketed bin; trapped moisture speeds up rot. Keep potatoes and onions apart if you can, since onions tend to make potatoes sprout faster.
Spices: the first test case
Spices are the clearest example of the vertical-versus-horizontal trade-off. A house kitchen can have a drawer of 40 jars and rarely use most of them. A van kitchen that keeps 12 to 24 spices needs every one of them within easy reach, without giving up a drawer.
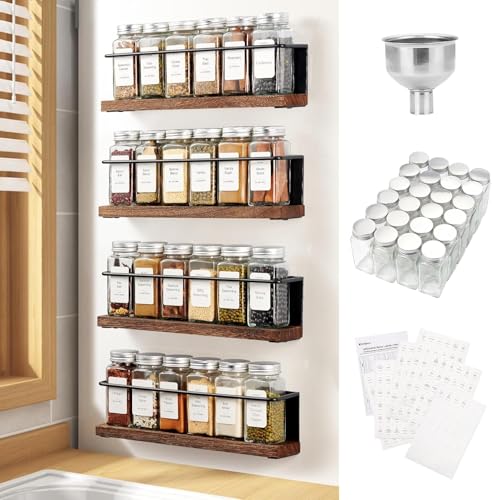
The best answer is a magnetic spice rack on a wall-mounted steel plate. The KitHero Magnetic Spice Rack, which replaced the Gneiss Spice rack in our lineup, is four magnetic shelves (each listed at about 12 by 2 by 3 inches and rated to hold 6.6 lb) with 24 square 4-oz glass jars, shaker lids, labels and a funnel. It doesn't include a mounting plate, and most van walls aren't magnetic, so plan on screwing a magnetic steel sheet (mild, galvanized, or 430 stainless; test it with a fridge magnet) to solid backing, ideally inside a cabinet door. The case for it:
- Zero counter or drawer space. The drawer your spices would have taken is free for something else.
- Instant inventory. You see every spice at a glance and stop rediscovering a forgotten jar of cumin three weeks later.
- Secure it for driving. The jars aren't magnetic themselves; they stand behind a half-height rail and can bounce over it on washboard. Mounting the shelves inside a closed cabinet, or running a thin bungee across each row, solves that.
- Refillable. Buy in bulk, refill, and waste less.
DIY alternative: small metal-lidded tins or jars with neodymium discs glued to the lids, on a sheet of steel. Each jar is held individually, which is more secure on rough roads, but it takes a weekend to build.
What to avoid: clip-on plastic racks (the clips break), in-drawer spice organizers (they turn into a jumble), and tiered countertop racks (bottles tip over on washboard).
Cookware: nest, stack, or hang
Cookware has three realistic storage strategies:
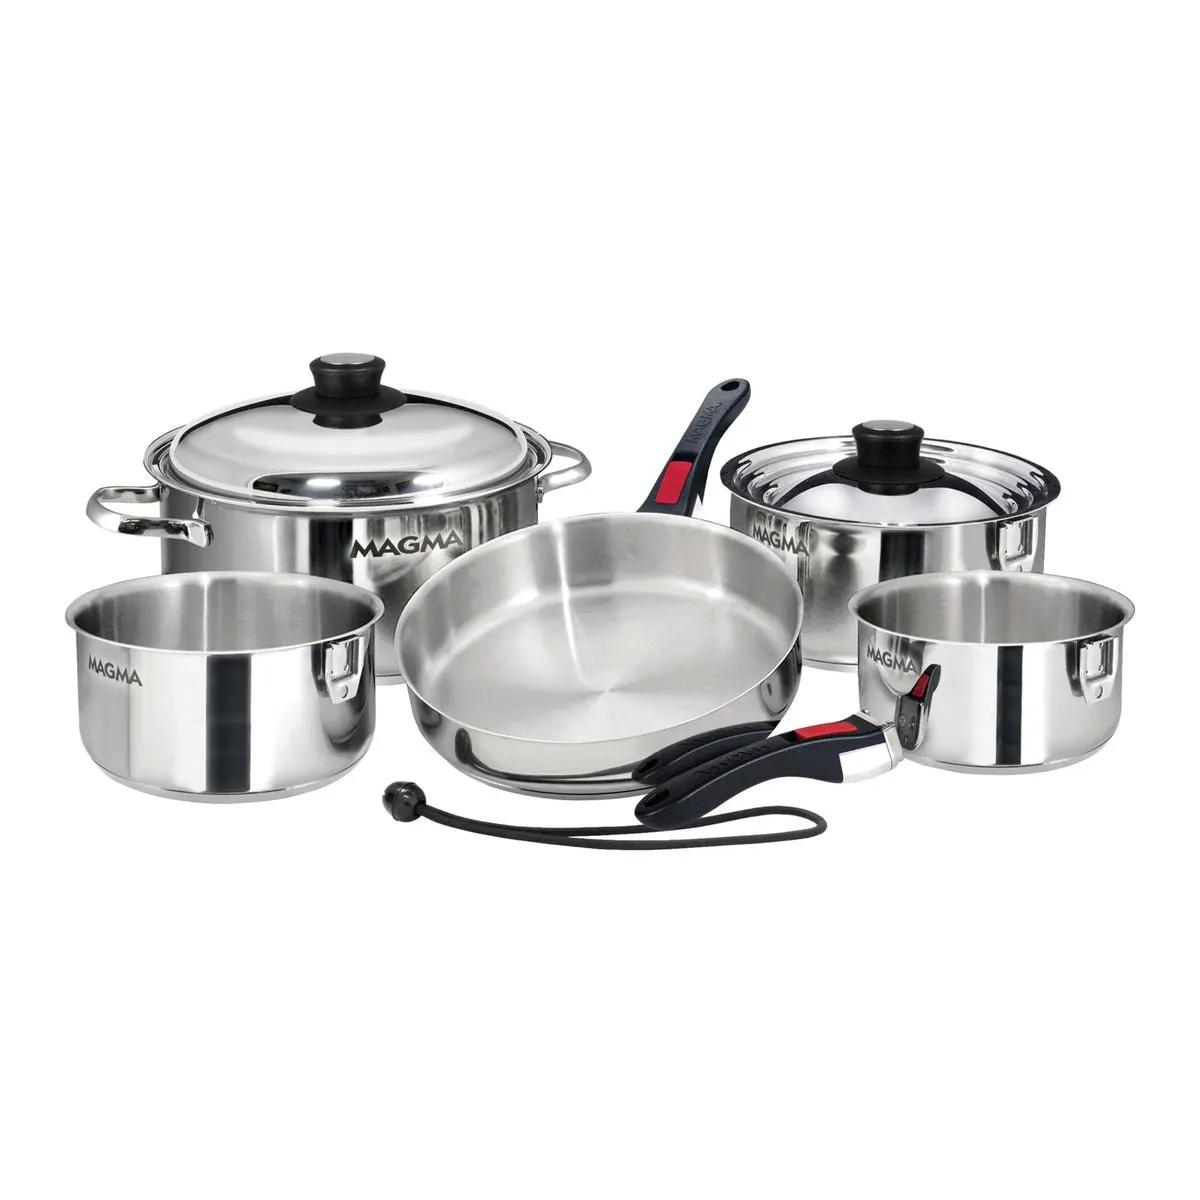
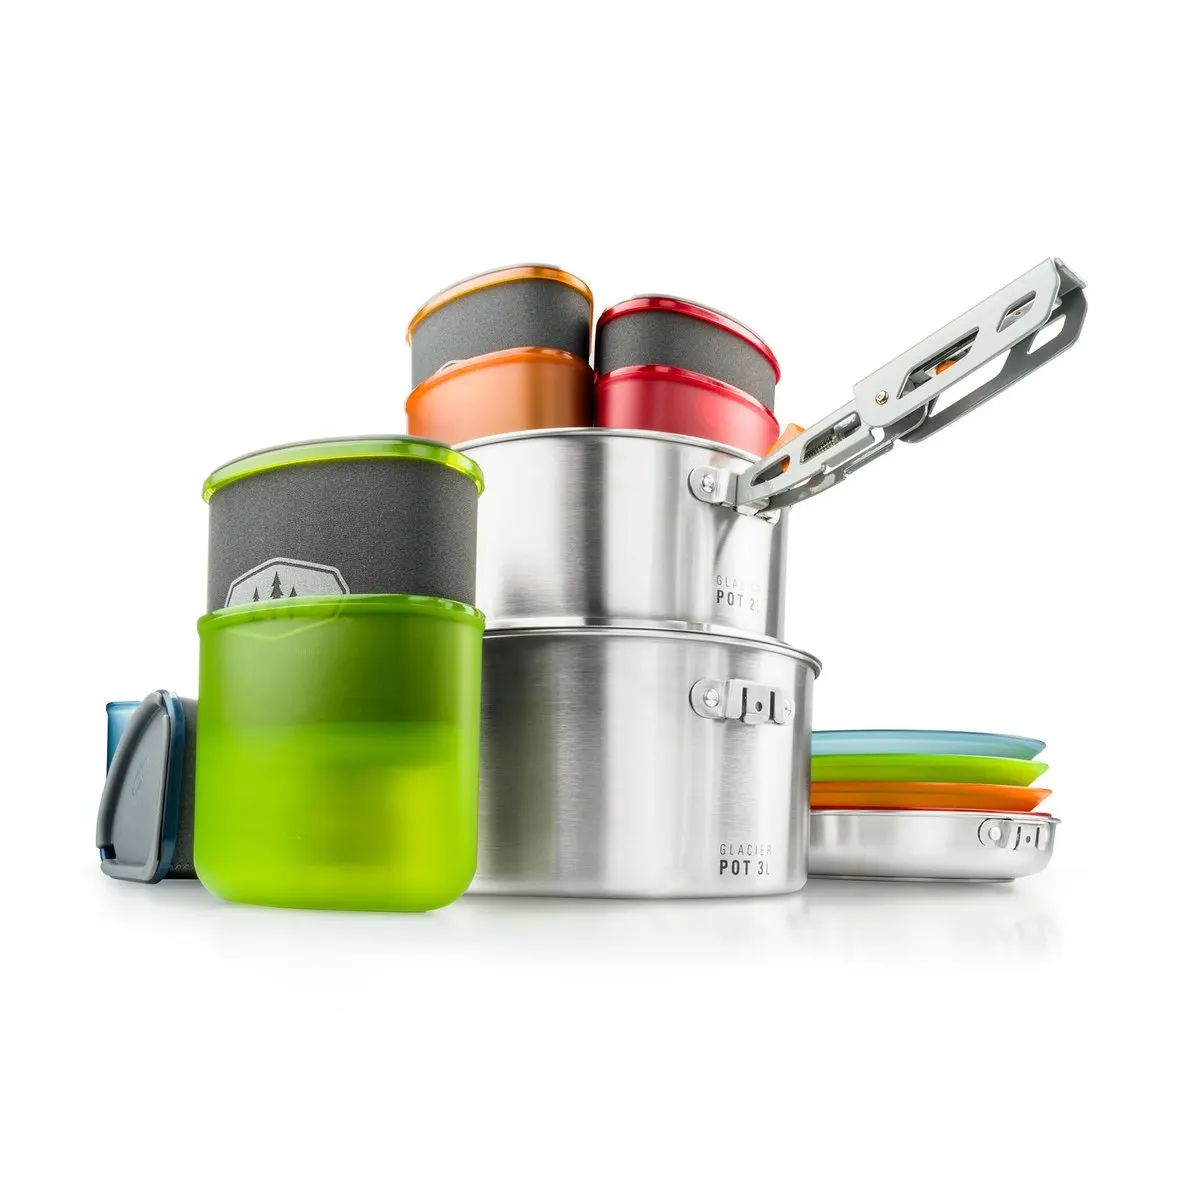
Nesting cookware sets. A full set of pots and pans that collapses into one stack, such as the Magma Nesting 10-Piece or the GSI Glacier Stainless Camper. For most van builds this is the most space-efficient approach by a wide margin. The cookware complete guide covers which sets and pans to choose.
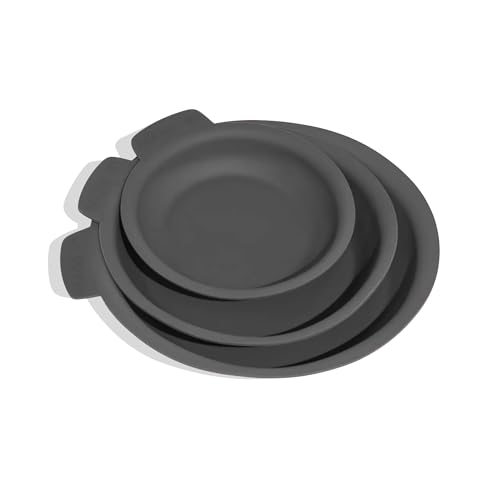
Stacking with dividers. If you already own mismatched pans, stack them with felt or silicone pan protectors between them in a deep drawer or cabinet. Silicone, such as the Made In pan protectors in 8, 10 and 12-inch sizes, doesn't soak up water and hold it against cast iron or carbon steel the way wet felt can. Protectors stop the knocking inside the stack; the stack itself still needs liner and a latched drawer. It's cheaper than a new set but uses more space.
Wall-mounted hooks or strips. Lids benefit most: a 12-inch lid is awkward in any cabinet but easy on a hook inside a cabinet door. Metal utensils can hang on a magnetic strip over the counter, as long as it's out of the cook's way.
Heavy cast iron and a Dutch oven belong low: a floor-level bin or a strapped-down spot under the galley. Never put cast iron in an upper cabinet. Always dry it fully before storing; a wet pan left in a closed cabinet overnight will rust.
What to avoid: open pot racks (things swing and fall in transit) and deep bins where you have to unload everything to reach the bottom pot.
Utensils and knives: the single-drawer rule
A van kitchen needs one organized utensil drawer, not three disorganized ones. Roughly a dozen tools cover almost all cooking: a chef's knife, a paring knife, a serrated knife, a wooden spoon, a silicone spatula, a slotted spoon, tongs, a whisk, a can opener, a peeler, a measuring cup and spoons, and a cutting board. Everything beyond that is a luxury, and in a van you have to pick your luxuries. You don't need three spatulas and a garlic press.
The ideal drawer is roughly 12 to 18 inches wide and 3 to 5 inches deep, with built-in dividers or a bamboo organizer tray. Put non-slip liner under the tray so nothing slides around while you drive.
Knives in particular never go loose in a drawer. Use one of these:
- A magnetic knife strip on a wall, at a height where you won't reach over a burner and not directly above where you stand to cook.
- An in-drawer knife block with individual slots, which is the most secure option. The Joseph Joseph DrawerStore Compact is 4½ inches wide, so it can share a wide drawer with a utensil tray.
- Individual blade guards on each knife, which is the cheapest option.
Loose knives in a moving van are a real injury risk during hard braking and when you reach into the drawer later. The van knife storage and safety guide covers this in depth, and the knives and prep complete guide covers which knives are worth carrying.
Fridge organization
A 12V compressor fridge holds far less than a house fridge, and everything inside it has to stay put on bumpy roads.
- Use rigid lidded containers for leftovers, not plates with foil. Glass meal-prep containers, stainless, or plastic with silicone seals stack well and don't tip. The Joseph Joseph Nest Lock 10-piece set is five plastic boxes from 8 to 101 fl oz with latching lids, and when empty they nest into one stack about 9.75 x 6.5 x 8 inches. Joseph Joseph describes the lids as leakproof but publishes no test, so keep soups upright in a basket. For bulk dry goods, three identical larger boxes fill a drawer more evenly; see Nest Lock vs Sistema KLIP IT.
- Put heavy items (drinks, condiments, jars) on the bottom to keep the center of gravity low.
- Put soft items (greens, herbs, berries) on top, where they're visible and won't get crushed.
- Move eggs into a hard egg case. Cardboard cartons soften in humidity and condensation.
- Contain anything that rolls. Tomatoes, lemons, and onions go in a container or mesh bag.
Most compressor fridges open from the top, so how you divide the basket matters more than anything else. Use dividers or small bins to split it into zones so things stay where you put them. That means less digging and less time with the lid open, which also means less power used. For fridge choice and power draw, see the 12V fridges complete guide.
Cutting boards and other flat items
Cutting boards, cooling racks, sheet pans, and trivets don't nest, so they rattle and fall out of cabinets. The fix is a vertical slot organizer: a few thin dividers fixed inside a cabinet so each flat item slides in on edge and stays separate. It costs very little in materials and ends the cutting-board avalanche every time you open the door. Silicone trivets are worth swapping in for metal ones: they don't rattle, they stack flat, and they handle hot pans fine.
Trash and recycling
Most builders forget about trash until it's overflowing on the counter. Plan a dedicated, lidded trash spot from the start. A pull-out bin or a 5-gallon bucket with a snap lid works fine. Line it, and empty it daily: food smells build up quickly in a closed van and can attract animals at camp.
Recycling is harder because you have to hold onto it until you find a drop-off. A separate collapsible bag for rinsed cans and bottles is usually enough.
The 5-bin van kitchen system
For minimalist and modular builds, five bins are a solid reference layout:
- Pantry bin (gasketed): pasta, rice, beans, crackers, shelf-stable proteins, backup spices. Fixed in a lower cabinet.
- Cookware bin: skillet, pot, utensils, cutting board, wash basin. Under the counter, ideally on a slide-out.
- Fresh food bin (ventilated): onions, garlic, squash, fruit. Floor level, mesh or open-topped, restrained so it can't slide.
- Cleaning bin: dish soap, sponges, towels, paper towels. Under the sink or in a lower door pocket. See the van kitchen dishwashing system.
- Overflow bin: extra pantry stock and restock items. Rear storage, under the bed, or a roof platform if it's rated for that.
Total volume is roughly 60 to 80 liters, which fits in about 4 to 5 cubic feet of cabinet or under-bench space. That's typically enough dry storage for two people cooking full-time for about a week between grocery runs. Depending on which bins you choose, the system runs from budget (gasketed plastic bins) to premium (rugged overland boxes). To plan where each bin goes in your galley, use the layout planner and the van kitchen layouts guide.
Best van kitchen storage (2026)
These are the storage products we've reviewed, grouped by job. Prices change often, so check current prices on Amazon before you buy.
Best overall pantry kit: Iris Weathertight Storage Set
The IRIS USA Weathertight 19-Qt bins (6-pack) set is the best value in modular dry-goods storage among the bins we've reviewed. The linked set is six identical 19-quart clear bins, each about 17.5 by 11.8 by 7.9 inches outside and 14.75 by 9.62 by 7 inches inside, with gasketed latching lids and see-through sides. Because every bin is the same size they stack and swap freely, and six of them is about right for a complete pantry: dry goods, snacks, pasta and rice, coffee, and backup stock. Measure your cabinet or under-bench space against the exterior footprint before you buy; there are no smaller bins in the set for shallow drawers or gaps.
When it loses: on rough overland routes, where a thin plastic bin can crack on a hard impact; anywhere you need true waterproofing; and in drawer-only or shallow-cabinet builds where a 7.9-inch-tall, 17.5-inch-long bin doesn't fit.
Best overland modular bin: Front Runner Wolf Pack Pro
The Wolf Pack Pro is a single ribbed polypropylene box, about 20 by 15.7 by 9 inches outside and about 30 liters inside (retailer interior figures). Dometic, which now owns Front Runner, lists it at about 8 lb, describes the lid as water- and dust-resistant rather than waterproof, and gives a 3-year warranty in the US. Its main advantage is the nesting fit: the base of each box sits into the recessed lid of the one below, so a strapped stack doesn't slide apart on corrugated roads. Front Runner doesn't publish a stacked load rating on the pages the review checked, so keep the heaviest box at the bottom and strap the stack down. It costs more per bin than the Iris. The Off-Grid Chef ProMaster setup uses it.
When it loses: purely indoor pantry use, where the Iris does the same job for much less per liter. A three-box Wolf Pack system costs considerably more than the whole Iris set.
Best spice solution: KitHero Magnetic Spice Rack, 24 Jars
The KitHero rack gives you four magnetic shelves and 24 glass 4-oz shaker jars with labels and a funnel for considerably less than premium jar-magnet systems. In a van, budget for a magnetic steel plate to mount it on, since none is included and most van walls won't hold a magnet, and secure the jars for driving with a closed cabinet or a bungee across each row. Filling the jars from bulk bins is a small extra cost. The main decision is whether 24 jars is more than you need; most van cooks get by with fewer, and you can mount only two or three shelves.
Best waterproof hard case: Yeti LoadOut GoBox 30
The Yeti LoadOut GoBox 30 is a roughly 28-liter (30-quart) hard case that retailer listings of Yeti's spec give as IP65 and IP67 (dustproof, and submersible to 1 m for up to 30 minutes), with a 5-year warranty and optional dividers sold separately. It's overkill for pasta. It's the right call for electronics, spare batteries, a camera, documents, or anything that can't be allowed to get wet in a leak or a crash.
Best compact protective case: Pelican 1430 Top Loader
The Pelican 1430 is IP67-rated, holds about 17 liters, and has Pelican's lifetime guarantee. It's a good fit for fragile tools or electronics that live near the galley. At 10.4 lb empty it's heavy for its size, so it suits a fixed spot better than a bin you move every day.
Best bulk trunk: Plano Sportsman 108-Quart Trunk
The Plano Sportsman trunk holds about 102 liters in a 36 by 17 by 13-inch footprint, which makes it the cheapest volume on this list. It's the overflow bin: duplicates, bulk restocks, and seasonal gear under the bed or in the rear garage. It's too big to pull out several times a day, and it won't fit in many small vans.
Useful extra: PackIt Freezable Grocery Bag
The PackIt grocery bag isn't a pantry bin. It's a 13-liter freezable tote that keeps cold food cold for a few hours between the store and the fridge, or while you defrost or reorganize the fridge. It folds flat when you're not using it.
Comparison table
| Product | Price tier | Capacity | Protection | Best for |
|---|---|---|---|---|
| IRIS USA Weathertight 19-Qt bins (6-pack) | Budget (set) | 6 × 19 qt bins | Gasketed (dust/moisture) | Main pantry, best value |
| Front Runner Wolf Pack Pro | Mid-range (each) | About 30 L | Stiff shell, nesting stack | Overland and rough roads |
| KitHero magnetic spice rack | Budget | 24 × 4 oz jars | Magnetic shelves; needs steel plate and a strap | Spices, zero drawer space |
| Yeti LoadOut GoBox 30 | Premium | ~28 L | IP67 (listed) | Electronics, must-stay-dry gear |
| Pelican 1430 | Premium | ~17 L | IP67 | Fragile tools, electronics |
| Plano Sportsman 108 qt | Budget | ~102 L | Basic | Bulk overflow under the bed |
Which kit to buy
| Scenario | Pick |
|---|---|
| Full-time pantry organization | Iris Weathertight 6-pack + KitHero spice rack (budget, plus a steel mounting plate) |
| Overland / rough terrain | 3 × Wolf Pack Pro + KitHero spice rack inside a closed cabinet (mid-range, plus a steel mounting plate) |
| Electronics or documents need waterproofing | Yeti LoadOut GoBox 30 or Pelican 1430, plus Iris for the pantry |
| Lots of bulk stock under the bed | Plano 108 qt trunk + Iris for daily galley access |
| Weekend or tight budget | Two or three Iris bins + a mesh produce bag; add the spice rack later |
For a direct comparison, see Front Runner Wolf Pack vs Yeti LoadOut GoBox and IRIS USA Weathertight vs Yeti LoadOut GoBox, or browse the whole storage category. If you're putting a full galley together on a tight budget, the minimal budget van kitchen guide and the layout planner show how storage fits alongside the stove and fridge.
Small habits that matter
These lessons come up across van builds:
- Put non-slip shelf liner in every drawer and cabinet. It costs very little and stops most sliding and rattling.
- Choose tall, narrow containers over short, wide ones. They use vertical space better and are easier to strap in place.
- Use positive mechanical latches, not magnetic catches. Magnetic catches can pop open from a jolt or when the van is parked on a slope. Push-button or other positive-locking latches stay shut, which matters most for cabinets holding anything heavy or breakable.
- Strap anything that can tip. An olive oil bottle or a tall jar held to the cabinet wall with a hook-and-loop strap won't end up as a mess on the floor.
- Label everything. Months in, you won't remember which white powder is salt and which is sugar. Masking tape and a marker are enough.
- Never use the counter as storage. Put things back right away. This habit matters more than any product.
What to skip
Things that look smart in build tours but tend to fail on the road:
- Glass jars for bulk storage. They're heavy and breakable, and they don't show you much more than clear plastic does. Save glass for small spice jars on a secured magnetic rack.
- Over-the-door organizers. They swing and bang on rough roads.
- Magnetic containers stuck to the outside of the fridge. The fridge vibrates and things slide off.
- Open shelving without a lip or bar. It looks great in photos, then everything ends up on the floor on the first bad road. If you want open shelves, add a tall front rail or a strap across them.
- Open-top bins without lids. They let in dust, moisture, and pests.
- Unlabeled opaque containers. You'll forget what's inside within a month.
- Dedicated wine racks and other single-purpose gadgets. One bottle strapped into a corner is enough. Don't build infrastructure for something you'll do twice.
Frequently asked questions
What is the best storage system for a van kitchen?
For most vans, the Iris Weathertight 6-bin set (six 19-quart bins) for the dry-goods pantry plus the KitHero magnetic spice rack for spices, mounted on a steel plate. That's a budget-friendly combination that covers full-time pantry needs. Upgrade to Front Runner Wolf Pack Pro bins if you drive a lot of rough or unpaved roads.
How do you organize a van kitchen?
Use a 5-bin system: a gasketed pantry bin for dry goods, a cookware bin for pots and utensils, a ventilated fresh-food bin at floor level, a cleaning bin under the sink, and an overflow bin in rear storage. Give every item a fixed home that survives driving, put things on walls instead of counters wherever you can, and keep heavy items low.
Do van cabinets need special latches?
Yes. Magnetic, friction and push-to-open catches can release on a jolt or a slope, so any cabinet or drawer holding heavy or breakable items needs a positive-locking latch that stays engaged until you operate it by hand. The guide to stopping van kitchen rattles compares latch types, drawer slide locks and what a latch can and can't hold.
Where should I store knives in a van?
On a wall-mounted magnetic knife strip (not directly above where you cook), in an in-drawer knife block with slots, or with a blade guard on each knife. Never keep knives loose in a drawer. They're dangerous when the van brakes or turns suddenly, and when you reach into the drawer later.
How do I organize a van fridge?
Put heavy items on the bottom for a low center of gravity and soft items on top where they won't be crushed. Keep leftovers in rigid lidded containers, move eggs into a hard egg case, and put anything round in a container or bag. In a top-opening fridge, use dividers or small bins to split the basket into zones so items stay where you put them.
Are gasketed storage bins waterproof?
No. A gasketed lid keeps out dust and humidity and handles a small spill, but these bins aren't rated for submersion or long contact with water. If a leak reaches a cabinet, water can get past the lid seam. For electronics, documents, or spare batteries, use a case with a published waterproof rating such as IP67.
Is open shelving practical in a van kitchen?
Not without restraint. Plain open shelves look good in photos, but items slide off on rough roads, and the shelves collect dust. Use closed cabinets with real latches, or add a tall front rail or strap to any open shelf.
Should I use glass or plastic containers in a van?
Use clear, gasketed plastic or stainless for anything that rides in a cabinet while driving. It's lighter, won't shatter, and lets you see what's inside. Glass is fine for small spice jars on a magnetic rack secured inside a cabinet and for leftover containers wedged in place in the fridge, but avoid it for bulk dry goods.
The verdict
For most van kitchens, the right storage kit is the IRIS USA Weathertight 19-Qt bins (6-pack) plus the KitHero magnetic spice rack plus a steel mounting plate, along with non-slip liner, a mesh produce bag, and proper knife storage. That covers the dry-goods pantry, spices, and daily access in almost any galley.
If you drive rough roads, switch the main pantry bins to Front Runner Wolf Pack Pro for the stiffer shell, the nesting stack and the water- and dust-resistant lid. Add a Yeti LoadOut GoBox 30 or Pelican 1430 only for gear that truly has to stay dry. Above all, van kitchen storage is about discipline more than purchases: a fixed home for everything, things on walls instead of counters, heavy items low, and nothing left loose when the van moves.
Products covered in this guide
Disclosure: As an Amazon Associate I earn from qualifying purchases. Links to Amazon on this page are affiliate links: if you buy through one, VanLifeKitchens.com may earn a commission at no extra cost to you. Read our affiliate disclosure.
More in Buying Guides
The Complete Van Life Solar Cooking Guide
Can you really cook with the sun from a van? The definitive guide to tube cookers, box ovens, and hybrid solar-electric systems — 4 products compared, with honest notes on what actually works.

Best Coffee Gear for Van Life: Complete Guide
How to brew great coffee in a van: AeroPress, pour-over, moka, French press and real espresso compared, plus grinders, kettles, power and water use, and our 2026 picks.
Best Van Kitchen Knives & Prep Tools: Full Guide
The two-knife van kit, choosing a cutting board, shears, mandolines, sharpening on the road, safe storage and low-water hygiene, plus our 2026 knife and prep tool picks.